![]() v1.8
v1.8
DataStream API Tutorial
- Setting up a Maven Project
- Writing a Flink Program
- Bonus Exercise: Running on a Cluster and Writing to Kafka
In this guide we will start from scratch and go from setting up a Flink project to running a streaming analysis program on a Flink cluster.
Wikipedia provides an IRC channel where all edits to the wiki are logged. We are going to read this channel in Flink and count the number of bytes that each user edits within a given window of time. This is easy enough to implement in a few minutes using Flink, but it will give you a good foundation from which to start building more complex analysis programs on your own.
Setting up a Maven Project
We are going to use a Flink Maven Archetype for creating our project structure. Please see Java API Quickstart for more details about this. For our purposes, the command to run is this:
$ mvn archetype:generate \
    -DarchetypeGroupId=org.apache.flink \
    -DarchetypeArtifactId=flink-quickstart-java \
    -DarchetypeVersion=1.8.0 \
    -DgroupId=wiki-edits \
    -DartifactId=wiki-edits \
    -Dversion=0.1 \
    -Dpackage=wikiedits \
    -DinteractiveMode=false
You can edit the groupId, artifactId and package if you like. With the above parameters,
Maven will create a project structure that looks like this:
$ tree wiki-edits
wiki-edits/
├── pom.xml
└── src
    └── main
        ├── java
        │   └── wikiedits
        │       ├── BatchJob.java
        │       └── StreamingJob.java
        └── resources
            └── log4j.properties
There is our pom.xml file that already has the Flink dependencies added in the root directory and
several example Flink programs in src/main/java. We can delete the example programs, since
we are going to start from scratch:
$ rm wiki-edits/src/main/java/wikiedits/*.javaAs a last step we need to add the Flink Wikipedia connector as a dependency so that we can
use it in our program. Edit the dependencies section of the pom.xml so that it looks like this:
<dependencies>
    <dependency>
        <groupId>org.apache.flink</groupId>
        <artifactId>flink-java</artifactId>
        <version>${flink.version}</version>
    </dependency>
    <dependency>
        <groupId>org.apache.flink</groupId>
        <artifactId>flink-streaming-java_2.11</artifactId>
        <version>${flink.version}</version>
    </dependency>
    <dependency>
        <groupId>org.apache.flink</groupId>
        <artifactId>flink-clients_2.11</artifactId>
        <version>${flink.version}</version>
    </dependency>
    <dependency>
        <groupId>org.apache.flink</groupId>
        <artifactId>flink-connector-wikiedits_2.11</artifactId>
        <version>${flink.version}</version>
    </dependency>
</dependencies>
Notice the flink-connector-wikiedits_2.11 dependency that was added. (This example and
the Wikipedia connector were inspired by the Hello Samza example of Apache Samza.)
Writing a Flink Program
It’s coding time. Fire up your favorite IDE and import the Maven project or open a text editor and
create the file src/main/java/wikiedits/WikipediaAnalysis.java:
package wikiedits;

public class WikipediaAnalysis {

    public static void main(String[] args) throws Exception {

    }
}
The program is very basic now, but we will fill it in as we go. Note that I’ll not give import statements here since IDEs can add them automatically. At the end of this section I’ll show the complete code with import statements if you simply want to skip ahead and enter that in your editor.
The first step in a Flink program is to create a StreamExecutionEnvironment
(or ExecutionEnvironment if you are writing a batch job). This can be used to set execution
parameters and create sources for reading from external systems. So let’s go ahead and add
this to the main method:
StreamExecutionEnvironment see = StreamExecutionEnvironment.getExecutionEnvironment();Next we will create a source that reads from the Wikipedia IRC log:
DataStream<WikipediaEditEvent> edits = see.addSource(new WikipediaEditsSource());This creates a DataStream of WikipediaEditEvent elements that we can further process. For
the purposes of this example we are interested in determining the number of added or removed
bytes that each user causes in a certain time window, let’s say five seconds. For this we first
have to specify that we want to key the stream on the user name, that is to say that operations
on this stream should take the user name into account. In our case the summation of edited bytes in the windows
should be per unique user. For keying a Stream we have to provide a KeySelector, like this:
KeyedStream<WikipediaEditEvent, String> keyedEdits = edits
    .keyBy(new KeySelector<WikipediaEditEvent, String>() {
        @Override
        public String getKey(WikipediaEditEvent event) {
            return event.getUser();
        }
    });
This gives us a Stream of WikipediaEditEvent that has a String key, the user name.
We can now specify that we want to have windows imposed on this stream and compute a
result based on elements in these windows. A window specifies a slice of a Stream
on which to perform a computation. Windows are required when computing aggregations
on an infinite stream of elements. In our example we will say
that we want to aggregate the sum of edited bytes for every five seconds:
DataStream<Tuple2<String, Long>> result = keyedEdits
    .timeWindow(Time.seconds(5))
    .fold(new Tuple2<>("", 0L), new FoldFunction<WikipediaEditEvent, Tuple2<String, Long>>() {
        @Override
        public Tuple2<String, Long> fold(Tuple2<String, Long> acc, WikipediaEditEvent event) {
            acc.f0 = event.getUser();
            acc.f1 += event.getByteDiff();
            return acc;
        }
    });
The first call, .timeWindow(), specifies that we want to have tumbling (non-overlapping) windows
of five seconds. The second call specifies a Fold transformation on each window slice for
each unique key. In our case we start from an initial value of ("", 0L) and add to it the byte
difference of every edit in that time window for a user. The resulting Stream now contains
a Tuple2<String, Long> for every user which gets emitted every five seconds.
The only thing left to do is print the stream to the console and start execution:
result.print();

see.execute();
That last call is necessary to start the actual Flink job. All operations, such as creating
sources, transformations and sinks only build up a graph of internal operations. Only when
execute() is called is this graph of operations thrown on a cluster or executed on your local
machine.
The complete code so far is this:
package wikiedits;

import org.apache.flink.api.common.functions.FoldFunction;
import org.apache.flink.api.java.functions.KeySelector;
import org.apache.flink.api.java.tuple.Tuple2;
import org.apache.flink.streaming.api.datastream.DataStream;
import org.apache.flink.streaming.api.datastream.KeyedStream;
import org.apache.flink.streaming.api.environment.StreamExecutionEnvironment;
import org.apache.flink.streaming.api.windowing.time.Time;
import org.apache.flink.streaming.connectors.wikiedits.WikipediaEditEvent;
import org.apache.flink.streaming.connectors.wikiedits.WikipediaEditsSource;

public class WikipediaAnalysis {

  public static void main(String[] args) throws Exception {

    StreamExecutionEnvironment see = StreamExecutionEnvironment.getExecutionEnvironment();

    DataStream<WikipediaEditEvent> edits = see.addSource(new WikipediaEditsSource());

    KeyedStream<WikipediaEditEvent, String> keyedEdits = edits
      .keyBy(new KeySelector<WikipediaEditEvent, String>() {
        @Override
        public String getKey(WikipediaEditEvent event) {
          return event.getUser();
        }
      });

    DataStream<Tuple2<String, Long>> result = keyedEdits
      .timeWindow(Time.seconds(5))
      .fold(new Tuple2<>("", 0L), new FoldFunction<WikipediaEditEvent, Tuple2<String, Long>>() {
        @Override
        public Tuple2<String, Long> fold(Tuple2<String, Long> acc, WikipediaEditEvent event) {
          acc.f0 = event.getUser();
          acc.f1 += event.getByteDiff();
          return acc;
        }
      });

    result.print();

    see.execute();
  }
}
You can run this example in your IDE or on the command line, using Maven:
$ mvn clean package
$ mvn exec:java -Dexec.mainClass=wikiedits.WikipediaAnalysis
The first command builds our project and the second executes our main class. The output should be similar to this:
1> (Fenix down,114)
6> (AnomieBOT,155)
8> (BD2412bot,-3690)
7> (IgnorantArmies,49)
3> (Ckh3111,69)
5> (Slade360,0)
7> (Narutolovehinata5,2195)
6> (Vuyisa2001,79)
4> (Ms Sarah Welch,269)
4> (KasparBot,-245)
The number in front of each line tells you on which parallel instance of the print sink the output was produced.
This should get you started with writing your own Flink programs. To learn more you can check out our guides about basic concepts and the DataStream API. Stick around for the bonus exercise if you want to learn about setting up a Flink cluster on your own machine and writing results to Kafka.
Bonus Exercise: Running on a Cluster and Writing to Kafka
Please follow our local setup tutorial for setting up a Flink distribution on your machine and refer to the Kafka quickstart for setting up a Kafka installation before we proceed.
As a first step, we have to add the Flink Kafka connector as a dependency so that we can
use the Kafka sink. Add this to the pom.xml file in the dependencies section:
<dependency>
    <groupId>org.apache.flink</groupId>
    <artifactId>flink-connector-kafka-0.11_2.11</artifactId>
    <version>${flink.version}</version>
</dependency>
Next, we need to modify our program. We’ll remove the print() sink and instead use a
Kafka sink. The new code looks like this:
result
    .map(new MapFunction<Tuple2<String,Long>, String>() {
        @Override
        public String map(Tuple2<String, Long> tuple) {
            return tuple.toString();
        }
    })
    .addSink(new FlinkKafkaProducer011<>("localhost:9092", "wiki-result", new SimpleStringSchema()));
The related classes also need to be imported:
import org.apache.flink.streaming.connectors.kafka.FlinkKafkaProducer011;
import org.apache.flink.api.common.serialization.SimpleStringSchema;
import org.apache.flink.api.common.functions.MapFunction;
Note how we first transform the Stream of Tuple2<String, Long> to a Stream of String using
a MapFunction. We are doing this because it is easier to write plain strings to Kafka. Then,
we create a Kafka sink. You might have to adapt the hostname and port to your setup. "wiki-result"
is the name of the Kafka stream that we are going to create next, before running our program.
Build the project using Maven because we need the jar file for running on the cluster:
$ mvn clean packageThe resulting jar file will be in the target subfolder: target/wiki-edits-0.1.jar. We’ll use
this later.
Now we are ready to launch a Flink cluster and run the program that writes to Kafka on it. Go to the location where you installed Flink and start a local cluster:
$ cd my/flink/directory
$ bin/start-cluster.sh
We also have to create the Kafka Topic, so that our program can write to it:
$ cd my/kafka/directory
$ bin/kafka-topics.sh --create --zookeeper localhost:2181 --replication-factor 1 --partitions 1 --topic wiki-results
Now we are ready to run our jar file on the local Flink cluster:
$ cd my/flink/directory
$ bin/flink run -c wikiedits.WikipediaAnalysis path/to/wikiedits-0.1.jar
The output of that command should look similar to this, if everything went according to plan:
03/08/2016 15:09:27 Job execution switched to status RUNNING.
03/08/2016 15:09:27 Source: Custom Source(1/1) switched to SCHEDULED
03/08/2016 15:09:27 Source: Custom Source(1/1) switched to DEPLOYING
03/08/2016 15:09:27 TriggerWindow(TumblingProcessingTimeWindows(5000), FoldingStateDescriptor{name=window-contents, defaultValue=(,0), serializer=null}, ProcessingTimeTrigger(), WindowedStream.fold(WindowedStream.java:207)) -> Map -> Sink: Unnamed(1/1) switched to SCHEDULED
03/08/2016 15:09:27 TriggerWindow(TumblingProcessingTimeWindows(5000), FoldingStateDescriptor{name=window-contents, defaultValue=(,0), serializer=null}, ProcessingTimeTrigger(), WindowedStream.fold(WindowedStream.java:207)) -> Map -> Sink: Unnamed(1/1) switched to DEPLOYING
03/08/2016 15:09:27 TriggerWindow(TumblingProcessingTimeWindows(5000), FoldingStateDescriptor{name=window-contents, defaultValue=(,0), serializer=null}, ProcessingTimeTrigger(), WindowedStream.fold(WindowedStream.java:207)) -> Map -> Sink: Unnamed(1/1) switched to RUNNING
03/08/2016 15:09:27 Source: Custom Source(1/1) switched to RUNNING
You can see how the individual operators start running. There are only two, because the operations after the window get folded into one operation for performance reasons. In Flink we call this chaining.
You can observe the output of the program by inspecting the Kafka topic using the Kafka console consumer:
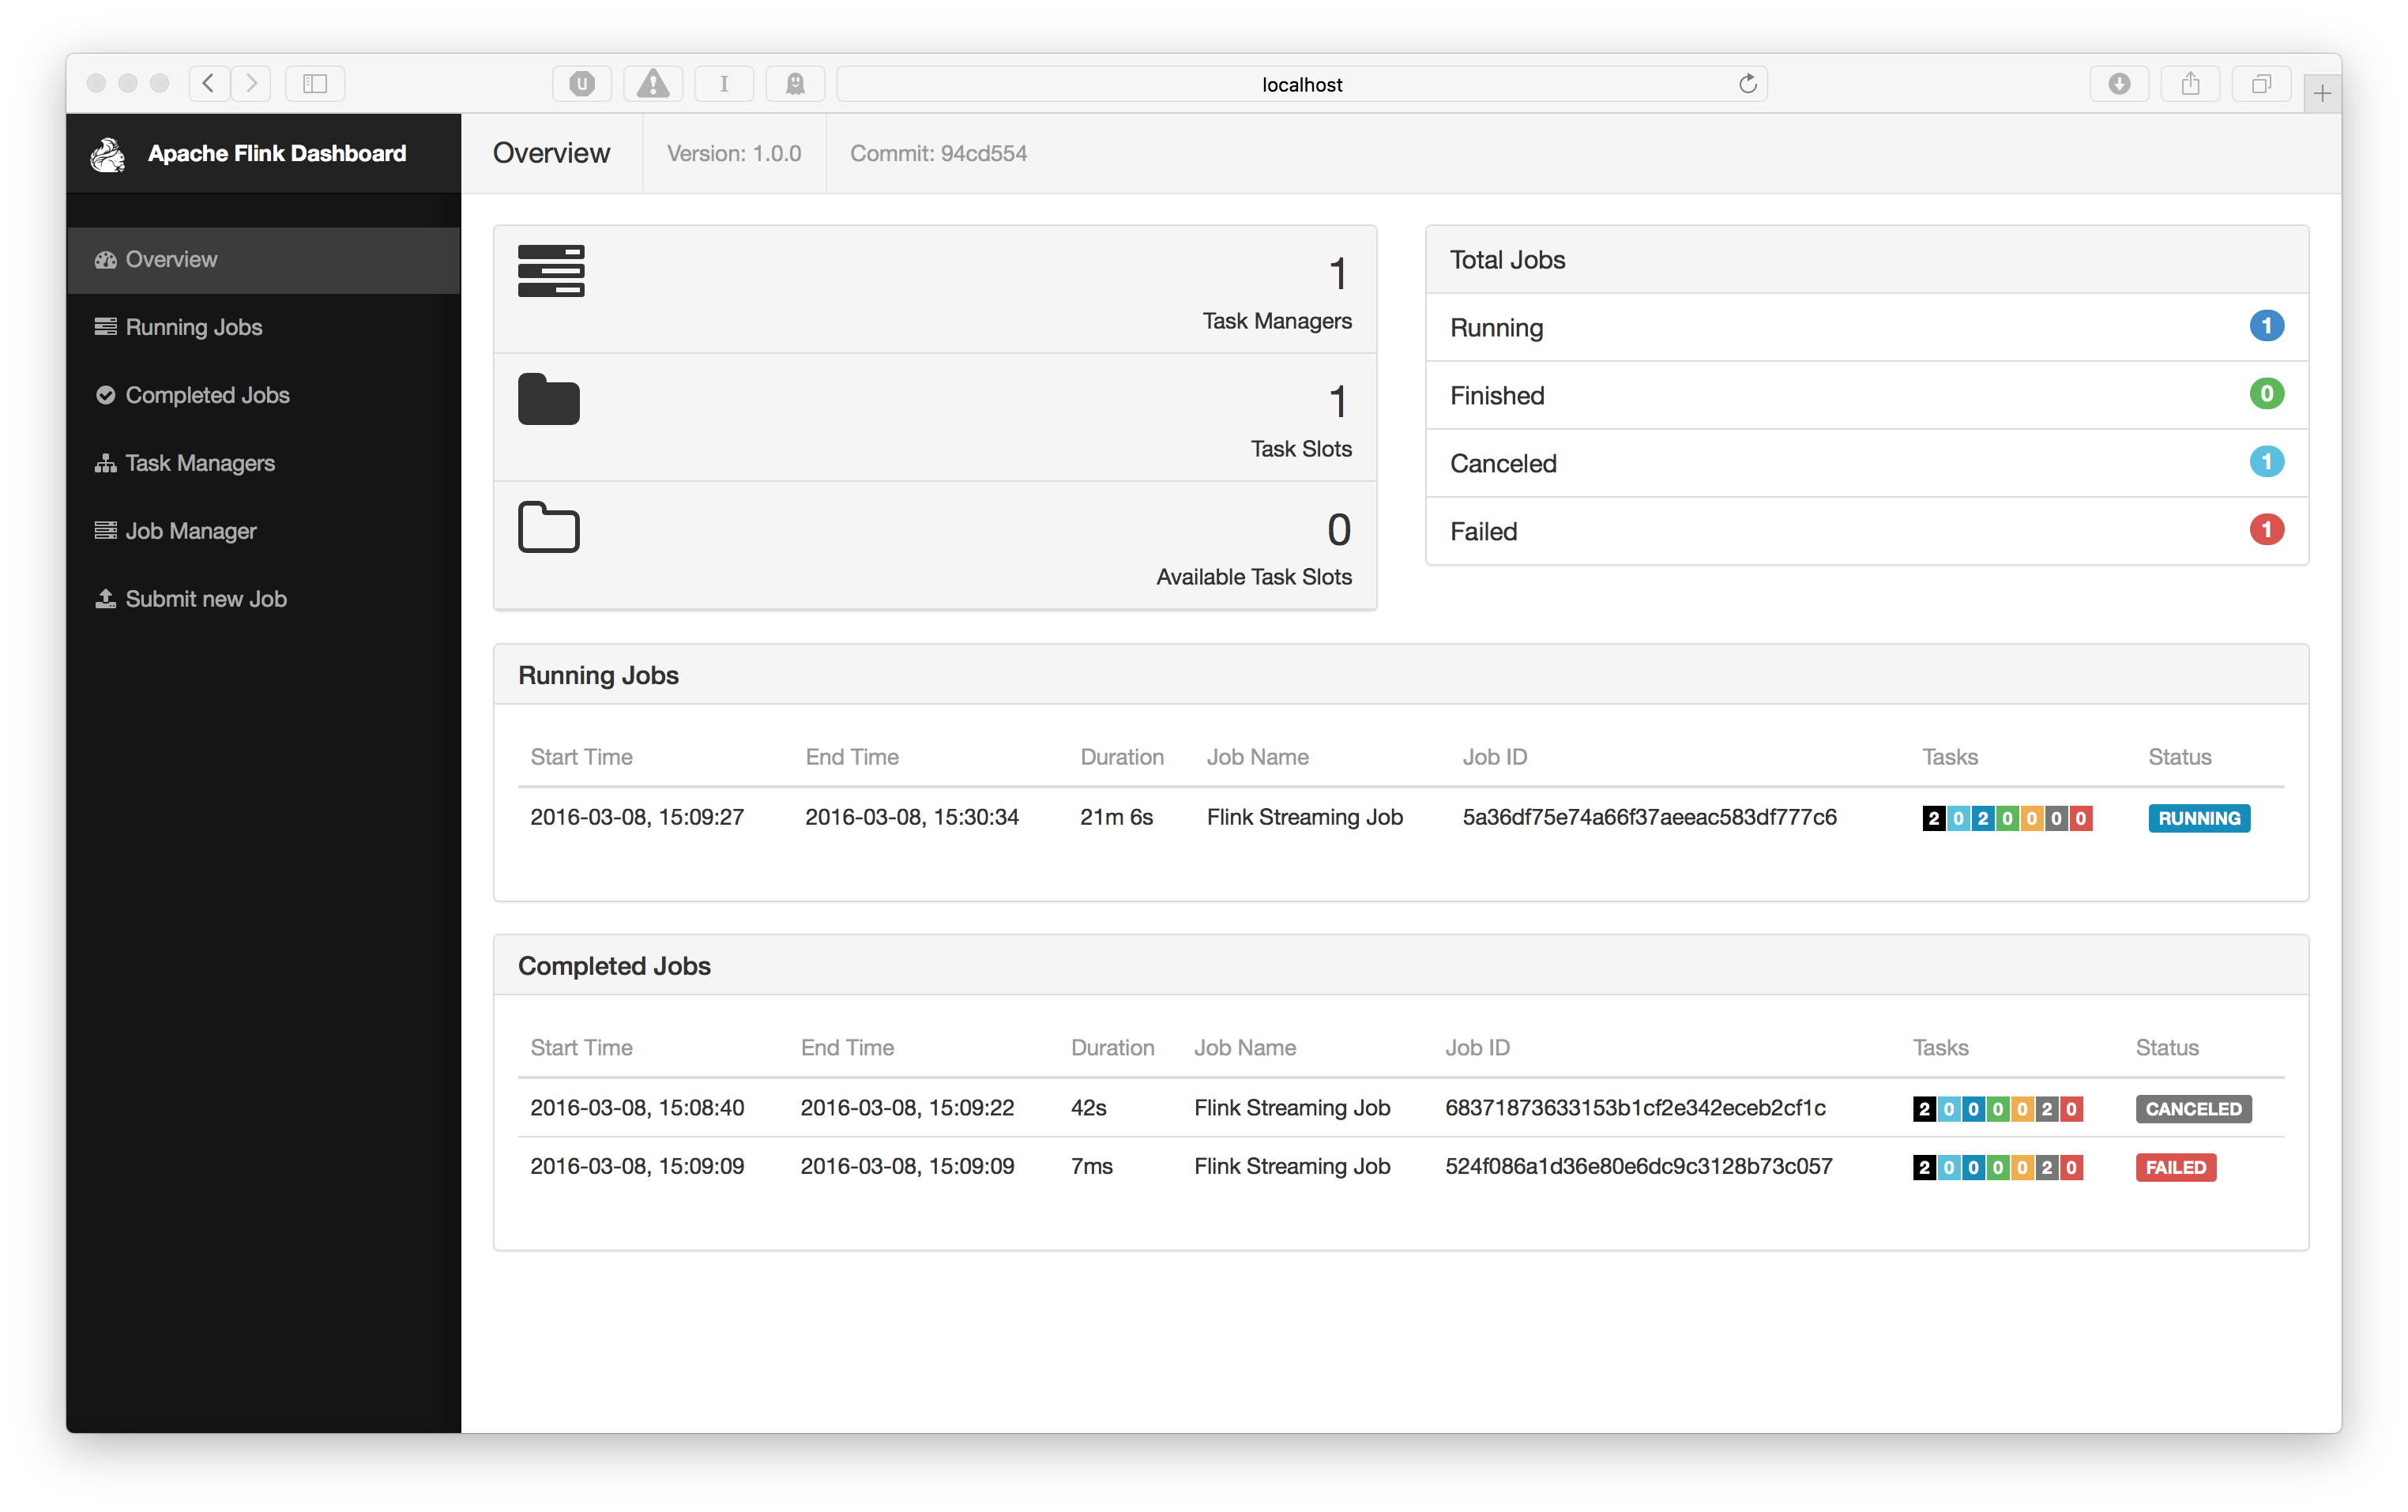
bin/kafka-console-consumer.sh --zookeeper localhost:2181 --topic wiki-resultYou can also check out the Flink dashboard which should be running at http://localhost:8081. You get an overview of your cluster resources and running jobs:
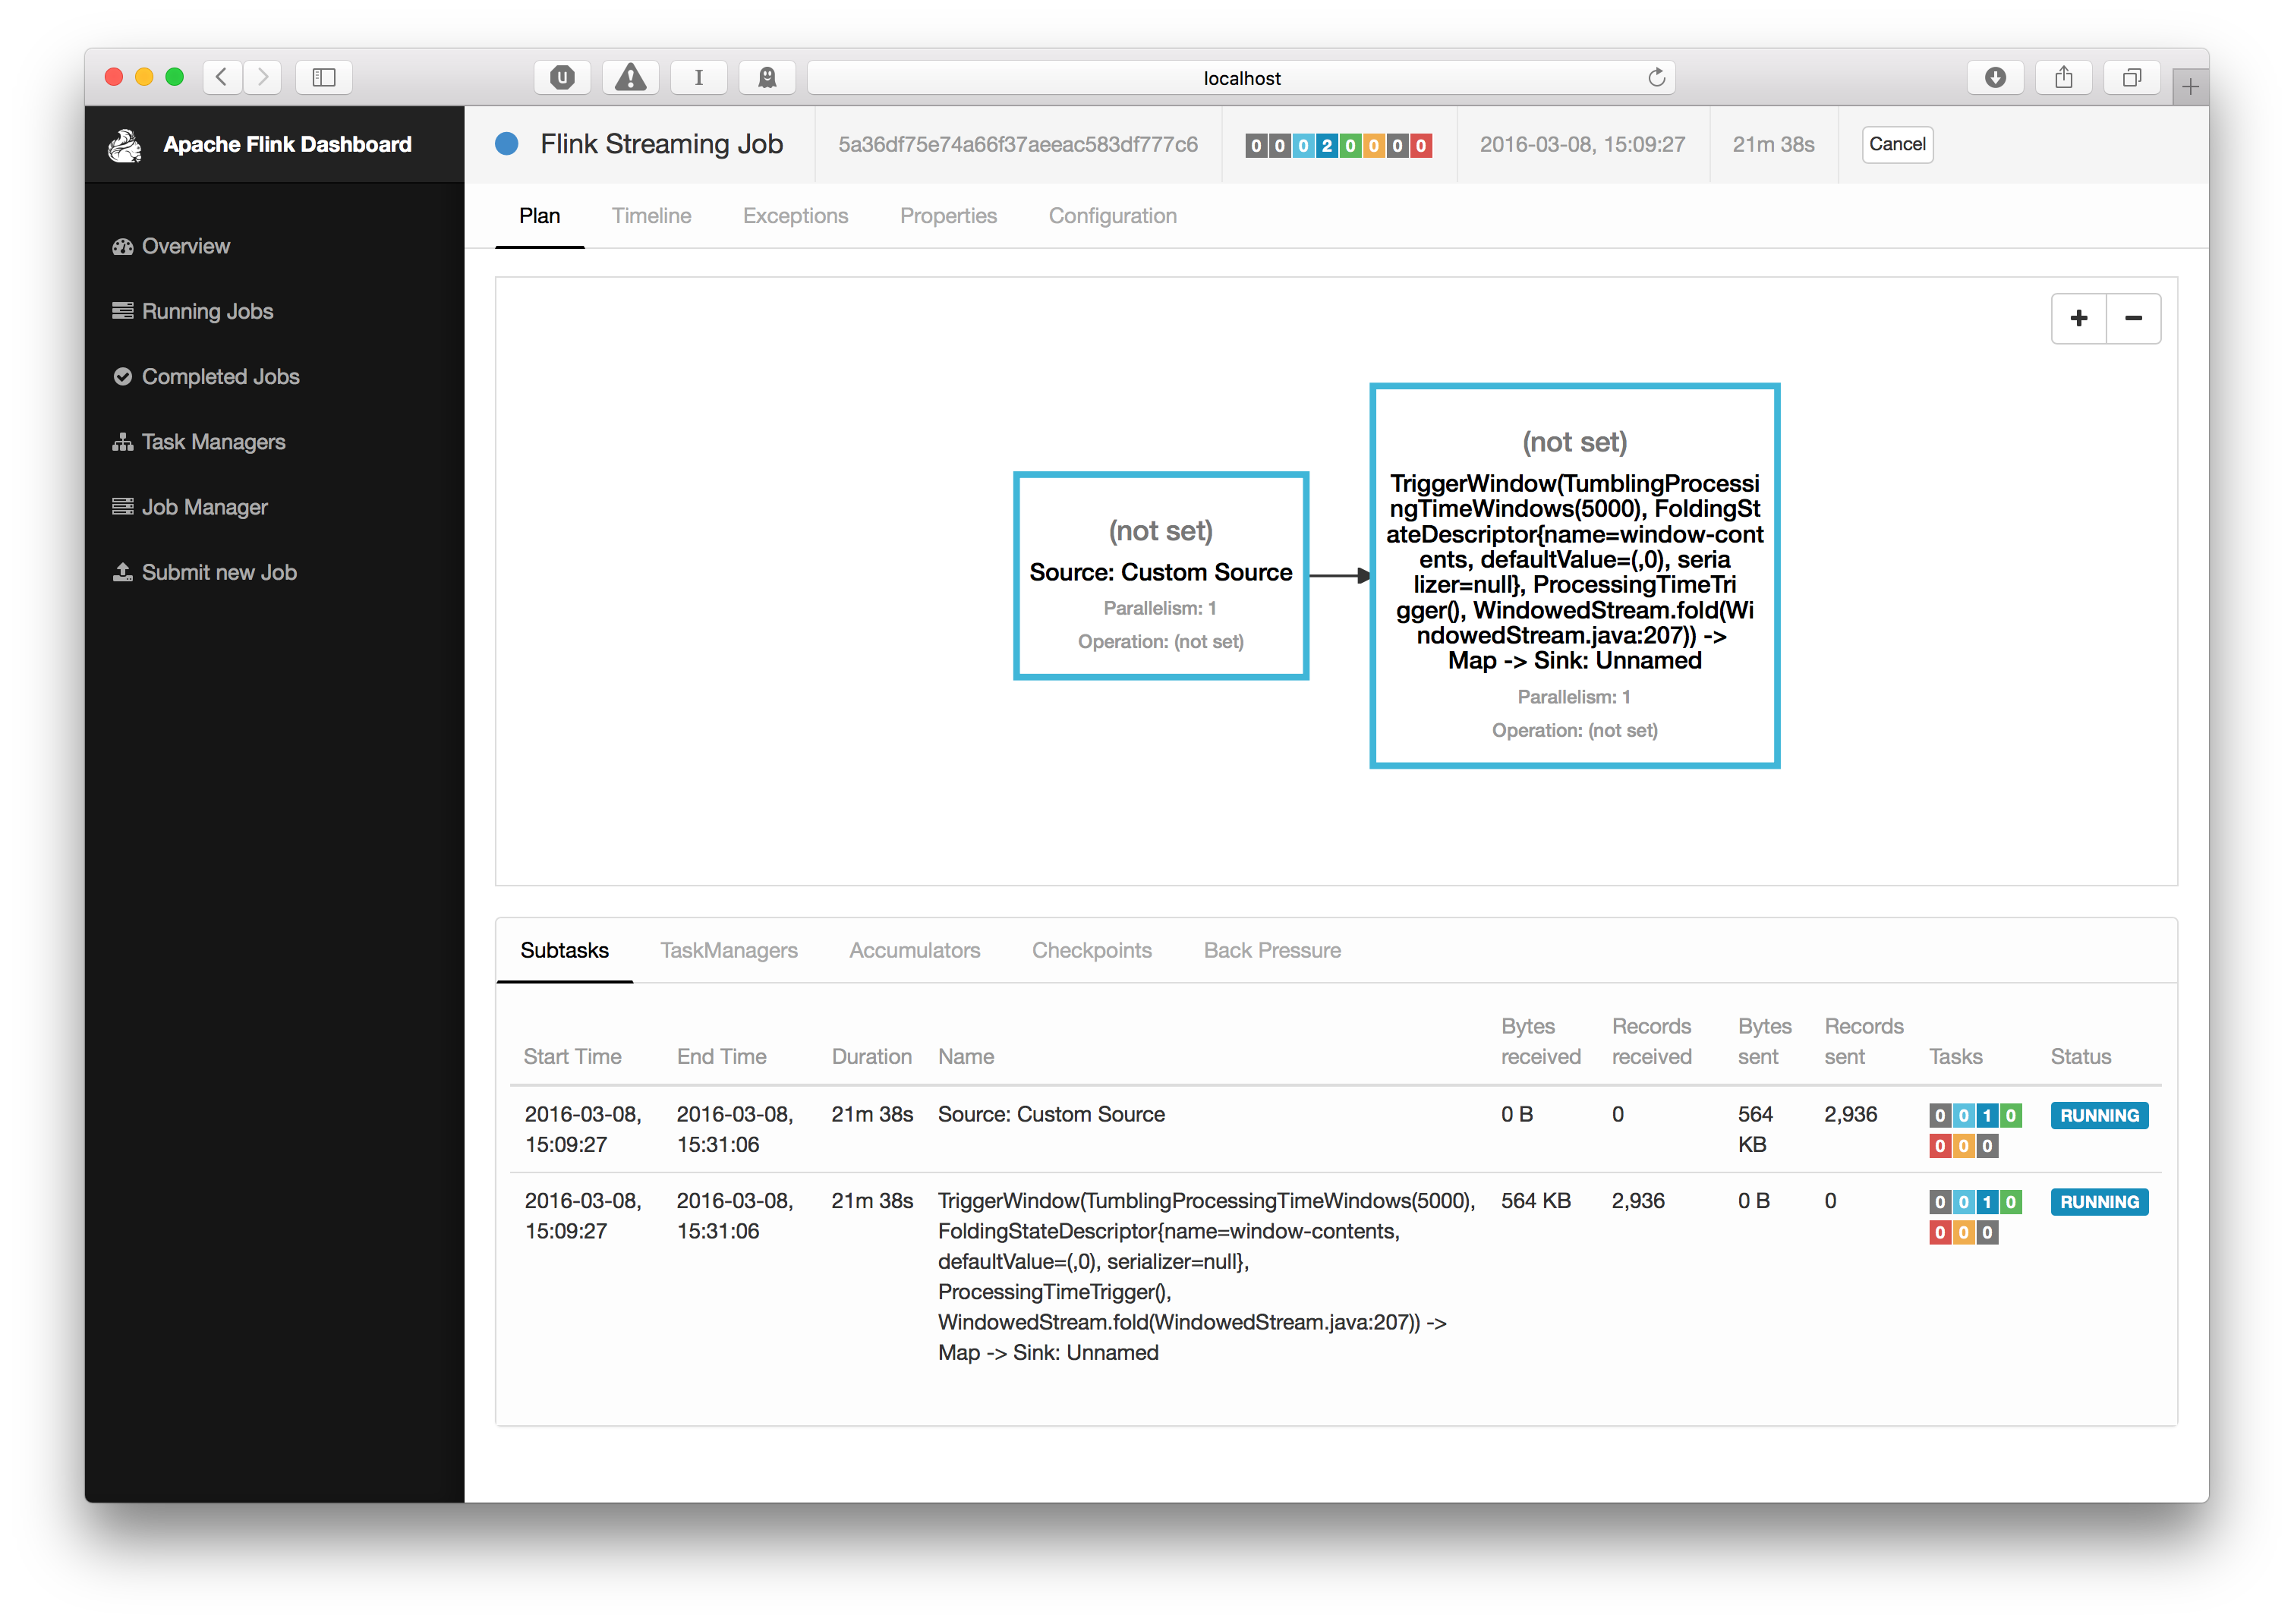
If you click on your running job you will get a view where you can inspect individual operations and, for example, see the number of processed elements:
This concludes our little tour of Flink. If you have any questions, please don’t hesitate to ask on our Mailing Lists.