To create a new LDIF file choose File -> New ,
expand LDAP Browser,
select
![]() LDIF File
and press the Finish button.
LDIF File
and press the Finish button.
To open an existing LDIF file choose File -> Open File, that opens a file dialog where you could select the LDIF file. Within Eclipse you could also open a LDIF file from Navigator view.
To save the modified LDIF choose File -> Save or File -> Save as and select a save location and enter the file name.
The LDIF editor also supports default editor functionality like Copy/Paste, Undo/Redo and a Find/Replace dialog, see Edit menu.
The LDIF editor could be connected to a directory server and its schema. You could select a connection at the top of the LDIF editor by pushing the Browse... button and selecting a connection from the dialog. Doing this will provide you the following features:
The Content Assistent will provide better attribute proposals.
The best value provider is choosen as default value editor.
The LDIF could be imported into the selected directory by invoking the
 execute button.
The LDIF editor provides a context-sensitive content assistent. To start content assistence press Ctrl+Space, then a popup with proposals is shown. You could select one using the cursur keys or the mouse, press Enter to apply the selected proposal. To close the popup press the ESC key. The following list shows the supported proposals:
When starting a new record a popup with record templates is shown.
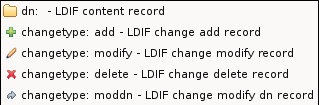
When writing an attribute in a content or add record a popup with a list with matching attributes is shown.

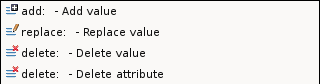
In an modify record the popup lists possible modify item templates.
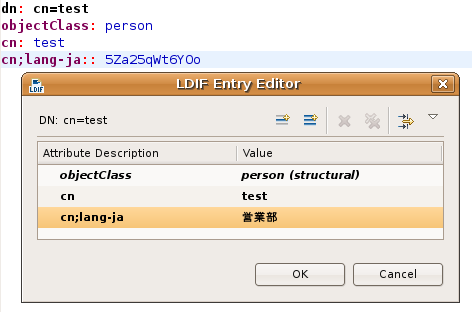
In LDIF values may only contain a subset of ASCII characters. Values with other characters (like accent mark) and even asiatic characters must be encoded using BASE-64. Also binary data like images or certificates must be encoded.
To edit such values Value editors could be used.
To start a Value editor move the cursor to the attribute or value and select Edit Value from context menu or press F7. This opens the default value editor dialog. You could also open a custom value editor by choosing one from Edit Value With in context menu.
To apply a modified value press the OK button in the value editor dialog, the previous value is replaced by the new value. Of course in LDIF they are displayed BASE-64 encoded.
It is possible to use the well-known Entry editor to edit content records and add records. Move the cursor to the record and choose Edit Record from context menu or press F8. This opens the LDIF record editor. You can add, modify and delete attributes. To apply the modification press OK, the previous record is replaced by the new one.
There are two ways to make BASE-64 values human readable:
Move the mouse over the value, a tooltip with the value is displayed. This works only for text-based values, not for binary values.

Open the value editor.
Syntax errors are displayed using error annotations.
In the ruler the error icon
![]() is displayed.
Additional the erroneous content is red squiggled.
is displayed.
Additional the erroneous content is red squiggled.
Note: The support for error annotations is still in development and has to be improved. The displayed messages are not very useful at the moment.
To format the document or the selected record according the LDIF Editor preferences choose Format from context menu.
Multi-lined comments, records and multi-lined values could be folded. There is a (+) and (-) in the left ruler to collapse and expand these. By default multi-lined comments and multi-lined values are folded. This behaviour could be changed in LDIF Editor preferences .