This wizard helps you to create a new entry.
To start the wizard choose one of the following options:
In the LDAP Browser view select an entry or search result or bookmark. Then choose
 New > New Entry...
from context menu.
New > New Entry...
from context menu.
In the Workbench window's toolbar, activate the drop-down menu on the New Wizard button and select LDAP Entry
In the Workbench menu bar select File > New > LDAP Entry .
The creation of a new LDAP entry is a four-step process:
First you have to select the entry creation method.

With the option Create entry from scratch you could create a the new entry from scratch. All object classes and attributes have to be specified in the wizard.
The option Use existing entry as template allows you to use an existing entry with its object classes and attributes as template. The entry used as template could be specified in the input field:
By default the DN of entry that was selected when the wizard has been started is used as template entry.
You could manually edit the DN of the templayte entry.
You could choose a previously used DN from drop-down list.
By clicking Browse.... you could open a dialog to select the DN of the template entry.
On the second page you have to choose the object classes of the new entry.
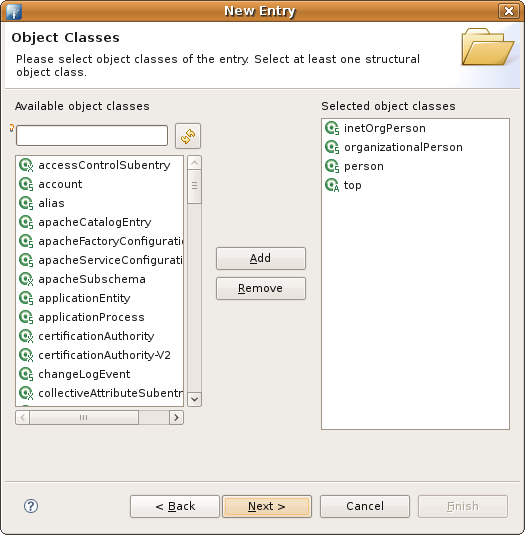
The list Available object classes on the left side lists the object classes provided from schema of the current connection. The list Selected object classes lists the object classes of the new entry. To add object classed to the "selected" list select some in the "available" list and click the Add button. You could also double-click an object class in the "available" list. To remove object classed from the "selected" list select some in the "selected" list and click the Remove button. You could also double-click an object class in the "selected" list.
On the third page you have to define the distinguished name of the new entry.

The parent of the new entry could be specified in the input field:
If you choosed the "from scratch" method the DN of entry that was selected when the wizard has been started is used by default. If you choosed the "template" method the parent of the template entry is used by default.
You could manually edit the parent DN.
You could choose a previously used DN from drop-down list.
By clicking Browse.... you could open a dialog to select the parent DN.
To specify the RDN select an attribute from the drop-down list and enter the value. If you choosed the "template" method the RDN is preset with the RDN of the template entry. The wizard also support multivalued RDNs. With the + and - buttons you can add and remove name-value pairs.
The DN preview field shows a preview of the DN.
When clicking to Next the wizard checks if an entry with the specified DN already exists. In that case you have to change the DN of the new entry.
On the fourth page you have to define the attributes of the new entry.
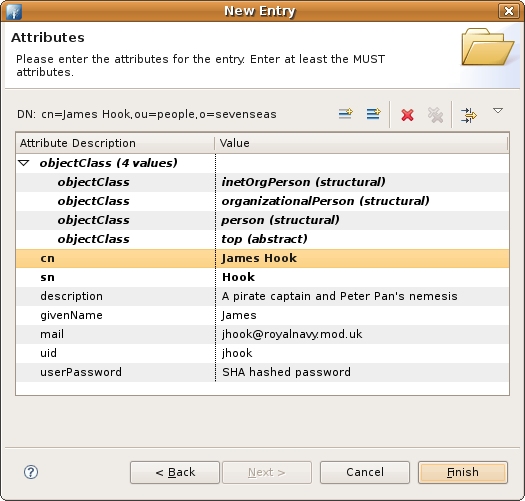
The layout and features are similar to the Entry editor. You could add, edit or delete attributes and values.
If you have choosed the "template" method all attributes of the template entry are already filled in the new entry. Otherwise only the selected object classes and the RDN attribute are filled.
As soon as all MUST attributes are filled the Finish button is activated. When clicking the button the new entry will be created in directory.